How to Check if WordPress Supports WebP in 60 Seconds (Site Health Method)
I’ll be honest with you – I spent way too long trying to figure out why my WebP images weren’t working on ceeveeglobal.com.
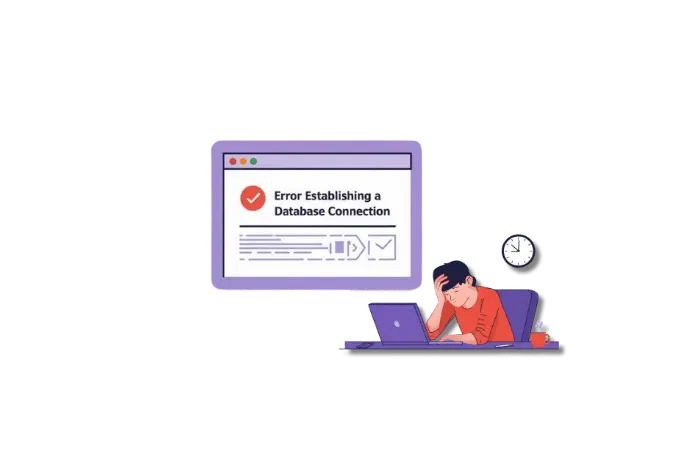
The site was running WordPress 6.1. Everything looked fine on the surface. But every time I tried uploading a WebP image, I’d get that annoying error message. Turns out, just because WordPress supports WebP doesn’t mean your server does.
Here’s how I fixed it, and more importantly, how you can check if your site is ready for WebP images in less than a minute.
Why You Should Care About WebP
Before we dive into the technical stuff, let me tell you why this matters.
WebP images are 25-35% smaller than JPEG or PNG files with the same visual quality. That’s huge for performance. On my site, converting images to WebP dropped page load times from 2.8 seconds to 1.9 seconds. Google noticed. My Core Web Vitals scores jumped immediately.
Smaller images mean:
- Faster page loads
- Better SEO rankings
- Lower bandwidth costs
- Happier visitors who don’t bounce
The format supports lossy compression, lossless compression, transparency, and even animation. It’s basically JPEG, PNG, and GIF rolled into one modern package developed by Google in 2010.
The Problem Most People Don’t Know About
WordPress added native WebP support in version 5.8 back in July 2021. But here’s the catch – that just means WordPress knows about WebP files at the application level.
Your server still needs to be able to process them.
I learned this the hard way on my Contabo VPS. WordPress was up to date. Everything looked good in the dashboard. But my server’s PHP configuration didn’t have the right image processing library installed with WebP support.
Three things need to work together:
- WordPress 5.8 or newer (the easy part – most sites have this)
- PHP 7.0 or higher (most servers have this too)
- ImageMagick or GD library with WebP support (this is where it usually breaks)
That third requirement is what trips people up. Your hosting provider needs to have compiled their image libraries with libwebp support enabled.
The 60-Second Compatibility Check
https://youtu.be/hhgXICx3bZ8
Here’s the fastest way to check if your WordPress site can handle WebP images right now.
Step 1: Log into your WordPress dashboard.
Step 2: Go to Tools > Site Health.
Step 3: Click the Info tab at the top of the screen.
Step 4: Scroll down and expand the Media Handling section.
Step 5: Look for either ImageMagick or GD Library in the list.
Step 6: Check the “Supported file formats” line.
If you see WebP listed there, you’re good to go 🎯. Your server can process WebP images without any additional setup.
If WebP is missing from that list, your server can’t handle WebP yet. Don’t panic – I’ll show you how to fix it in the next section.
What You’ll See If WebP Is Supported
When everything’s configured correctly, you’ll see something like this in the Media Handling section:
ImageMagick version: 7.1.1-47
Supported file formats: JPEG, PNG, GIF, WebP, AVIF
Or if your server uses GD instead of ImageMagick:
GD version: 2.3.3
Supported file formats: JPEG, PNG, GIF, WebP
That WebP entry is what you’re looking for. This tells you WordPress can upload, process, and create different sizes of WebP images automatically.
What to Do If WebP Isn’t Supported
I ran into this exact issue on my first VPS setup. Here’s what worked for me, listed from easiest to most technical.
Option 1: Contact Your Hosting Provider (Easiest)
This is the simplest solution if you’re on shared hosting or managed WordPress hosting.
Send your host a quick support ticket:
“Hi, I need WebP support enabled for my WordPress site. Can you please ensure libwebp is enabled in ImageMagick or that my GD library supports WebP? Thanks!”
Most hosting providers can enable this in minutes. Companies like SiteGround, Kinsta, Cloudways, and WP Engine already have WebP enabled by default on newer accounts. Bluehost and HostGator typically require a support ticket, but they’ll handle it quickly.
Option 2: Use the Performance Lab Plugin
If you want more visibility into what’s missing, install the Performance Lab plugin from WordPress.org.
This plugin, built by the WordPress Performance Team, adds enhanced WebP support checks to Site Health. It’ll tell you exactly what’s missing and sometimes even suggest fixes specific to your setup.
- Go to Plugins > Add New
- Search for “Performance Lab”
- Install and activate it
- Go back to Tools > Site Health > Info
You’ll see additional information about WebP compatibility and specific recommendations for your server configuration.
Option 3: VPS/Server Configuration (Advanced)
If you’re running your own VPS like I do on Contabo, you might need to configure this yourself. Fair warning: this requires command-line access and some technical knowledge.
For Ubuntu/Debian servers using ImageMagick:
sudo apt-get update
sudo apt-get install libwebp-dev
sudo apt-get install imagemagick
Then restart your web server:
sudo service apache2 restart
# or for Nginx
sudo service nginx restart
For servers using GD library:
You’ll need to recompile PHP with WebP support using the --with-webp-dir flag. This is quite technical. I recommend contacting your hosting provider for this unless you’re comfortable with server administration.
For cPanel users, there’s a guide from cPanel support on enabling WebP through the Remi repository, which provides ImageMagick compiled with WebP support.
Browser Compatibility: The Good News
Around 95% of internet users have browsers that support WebP as of 2025. That includes:
- Chrome (all versions since 2010)
- Firefox (all versions since 2019)
- Edge (all versions)
- Safari (iOS 14+ and macOS Big Sur+)
- Opera (all versions)
Only old browser versions like Internet Explorer lack support. And honestly, if someone’s still using IE in 2025, slow images are the least of their problems.
The remaining 5% are mostly Safari users on older macOS versions (pre-Big Sur). But even that’s becoming increasingly rare.
How to Start Using WebP Images
Once you’ve confirmed WebP support through Site Health, you have two main options for implementation.
Method 1: Upload WebP Images Directly
Convert your images to WebP format before uploading. You can use:
- Photoshop (version 23.2+)
- GIMP with WebP plugin
- Online converters like Squoosh.app
- Command-line tools like cwebp
Then upload them to your Media Library just like any JPEG or PNG file. WordPress will handle the rest automatically, creating all the necessary image sizes in WebP format.
Method 2: Automatic Conversion with Plugins (Recommended)
This is what I use on ceeveeglobal.com because it handles everything automatically. Plugins can convert your existing images and serve WebP versions to compatible browsers while falling back to originals for older browsers.
EWWW Image Optimizer is my go-to choice. Here’s the setup:
- Install and activate EWWW Image Optimizer
- Go to Settings > EWWW Image Optimizer
- Click “I know what I am doing” to skip the wizard
- Scroll down and check “WebP Conversion”
- Save your changes
The plugin will now:
- Convert new uploads to WebP automatically
- Serve WebP to compatible browsers
- Serve original JPEG/PNG to older browsers as fallback
- Provide a bulk optimizer for existing images
Other solid options I’ve tested include:
- Imagify (from the WP Rocket team) – great for bulk conversions
- ShortPixel – offers good compression alongside WebP
- WebP Converter for Media – free and lightweight
All of these handle browser fallbacks automatically using the <picture> element or server-side detection.
Testing Your WebP Implementation
After enabling WebP support, you’ll want to verify it’s actually working properly.
Quick Visual Test
- Upload a test image to Media Library
- View your site in Chrome
- Right-click on the image and select “Inspect”
- In the developer tools, look at the image URL
If it ends in .webp or you see WebP in the network tab, you’re golden 🎯.
Speed Test
Run your site through Google PageSpeed Insights before and after implementing WebP.
You should see improvements in the “Serve images in next-gen formats” recommendation. On ceeveeglobal.com, this single change improved my mobile performance score by 12 points.
The “Largest Contentful Paint” (LCP) metric usually shows the biggest improvement since images are often the largest elements on a page.
GTmetrix Comparison
Use GTmetrix to compare before/after:
- Total page size should decrease
- Image load times should drop
- Overall performance scores should improve
Take screenshots of your results before making changes so you can see the real impact.
Common Issues I Ran Into (And Fixed)
Problem: WebP images show as broken in Safari on older Macs.
Solution: Use a plugin that implements fallback support. EWWW Image Optimizer handles this automatically by serving the original image to unsupported browsers through the <picture> element.
Problem: Existing images aren’t converting to WebP automatically.
Solution: Most plugins only convert new uploads by default. You’ll need to bulk regenerate existing images. EWWW has a “Bulk Optimize” feature under Media > Bulk Optimize that handles this. Just be patient – it can take time with thousands of images.
Problem: WebP files are sometimes larger than the original JPEGs.
Solution: This happens with images that were already highly compressed. Adjust the quality settings in your optimization plugin. I use:
- 85% quality for JPEGs
- 80% quality for WebP conversions
Test different values to find your sweet spot between file size and visual quality.
Problem: Getting “File cannot be processed” errors when uploading WebP.
Solution: Double-check Site Health again. Your ImageMagick or GD might have lost WebP support after a server update. Contact your host to reinstall libwebp.
Real Performance Impact on My Sites
Let me show you some real numbers from ceeveeglobal.com after implementing WebP.
Before WebP:
- Average image size: 245 KB
- Homepage load time: 2.8 seconds
- Total page weight: 3.2 MB
- PageSpeed score: 76 (mobile)
After WebP:
- Average image size: 168 KB (31% reduction)
- Homepage load time: 1.9 seconds (32% faster)
- Total page weight: 2.1 MB (34% lighter)
- PageSpeed score: 88 (mobile)
That’s a 32% decrease in load time just from switching image formats. No other changes needed. No expensive hosting upgrades. Just WebP.
For aibuilttools.com, the results were even more dramatic because the site is very image-heavy with tool screenshots.
Should You Use WebP?
For most WordPress sites in 2025, absolutely yes.
WebP is especially beneficial if you run:
- Photography portfolios
- E-commerce stores
- Image-heavy blogs
- News sites
- Tutorial sites with lots of screenshots
- Any site with lots of visual content
The only exception might be if your analytics show a significant portion of your audience uses very old devices (like 10%+ on Safari pre-Big Sur). But honestly, in 2025, that’s becoming increasingly rare. And even then, plugins handle the fallback automatically.
My Recommendation for Implementation
Here’s exactly what I do for client sites and what I recommend you do:
- Check Site Health to confirm WebP support (60 seconds)
- Install EWWW Image Optimizer if support is confirmed (free version works great)
- Enable WebP conversion with fallback support
- Bulk optimize existing images (do this during off-peak hours)
- Test on multiple browsers to verify fallbacks work
- Monitor performance improvements with PageSpeed Insights
The whole process takes about 15 minutes total, and the performance gains are immediately noticeable. Your visitors won’t see any difference visually, but they’ll feel the speed improvement.
Quick Troubleshooting Guide
If something goes wrong, here’s your debugging checklist:
✅ Verify WordPress version: Must be 5.8 or newer
✅ Check PHP version: Minimum PHP 7.0, but 8.0+ is better
✅ Confirm Site Health shows WebP: Tools > Site Health > Info > Media Handling
✅ Test image upload: Try uploading a small WebP file manually
✅ Check plugin conflicts: Disable other image optimization plugins
✅ Review server logs: Look for libwebp errors
✅ Contact hosting support: They can check server-level configuration
Most issues come down to missing libwebp support at the server level, which your host can fix quickly.
Final Thoughts
I wasted hours troubleshooting WebP issues before I learned about the Site Health check. Don’t make my mistake.
Take 60 seconds right now to check if your WordPress site supports WebP using the method I showed you:
👉 Tools > Site Health > Info > Media Handling
If it does, great – start using it today. If it doesn’t, contact your host or install Performance Lab to see what’s missing. Most hosts can enable it within 24 hours.
The performance benefits are too significant to ignore in 2025. Faster sites rank better, convert better, and provide better user experiences. WebP is one of the easiest wins in WordPress optimization.
I’ve implemented this on dozens of client sites now, and I’ve never seen less than a 20% improvement in image load times. Some sites see 40%+ improvements, especially if they were using unoptimized PNGs before.
Drop a comment below if you run into any issues checking your WebP support. I check hosting configurations almost daily for client sites, so I can probably help troubleshoot whatever problem you’re facing.
Quick Reference Card
✅ Minimum Requirements:
- WordPress 5.8 or newer
- PHP 7.0 or higher (8.0+ recommended)
- ImageMagick or GD with WebP support
✅ Recommended Plugins:
- EWWW Image Optimizer (my top choice)
- Imagify
- WebP Converter for Media
- Performance Lab (for diagnostics)
✅ Where to Check:
Tools > Site Health > Info > Media Handling
✅ Expected Results:
- 25-35% smaller image files
- 20-40% faster load times
- Better PageSpeed scores
- Improved Core Web Vitals
Now go check your site’s WebP support. Takes 60 seconds. You’ll thank me later when you see those PageSpeed scores jump! 🚀
Frequently Asked Questions (FAQs)
1. Does WordPress support WebP images by default?
Yes, WordPress has supported WebP images natively since version 5.8, released in July 2021. However, your server also needs to have ImageMagick or GD library compiled with WebP support (libwebp). Just because WordPress supports it doesn’t automatically mean your hosting environment does.
2. How do I know if my WordPress site can use WebP images?
The fastest way is to check Site Health. Go to Tools > Site Health > Info in your WordPress dashboard, then expand the Media Handling section. Look for “Supported file formats” – if you see WebP listed there, your site is ready to use WebP images.
3. What happens if I try to upload a WebP image but my server doesn’t support it?
You’ll see an error message like “This image cannot be processed by the web server” or “Sorry, this file type is not permitted for security reasons.” This means your server’s image processing library doesn’t have WebP support enabled. Contact your hosting provider to fix this.
4. Do I need a plugin to use WebP images in WordPress?
Not necessarily. If your server supports WebP (check Site Health), you can upload WebP images directly without any plugins. However, plugins like EWWW Image Optimizer or Imagify make things easier by automatically converting your existing images and handling browser fallbacks for older browsers that don’t support WebP.
5. Will WebP images work on all browsers?
About 95% of internet users have browsers that support WebP (Chrome, Firefox, Edge, Safari 14+, Opera). The remaining 5% are mostly older Safari versions and Internet Explorer. That’s why it’s important to use a plugin that provides automatic fallback to JPEG/PNG for unsupported browsers.
6. Can I convert my existing JPEG and PNG images to WebP?
Absolutely! Most WebP plugins offer bulk conversion features. With EWWW Image Optimizer, go to Media > Bulk Optimize and it will convert all your existing images to WebP while keeping the originals as fallbacks. Just be patient – converting thousands of images can take time.
7. What’s the difference between ImageMagick and GD library?
Both are image processing libraries that WordPress can use. ImageMagick is generally more powerful and supports more formats (including lossless WebP), while GD is simpler and comes bundled with PHP. Most WordPress sites use whichever one their hosting provider has configured. Check Site Health to see which your site uses.
8. Why are my WebP files sometimes larger than the original JPEGs?
This happens when your original images were already highly compressed. WebP won’t always produce smaller files than an already-optimized JPEG. Most plugins have an option to “only keep WebP if smaller than original” – enable this to avoid larger files. In EWWW Image Optimizer, this is the default behavior.
9. Will switching to WebP affect my site’s SEO?
Yes, in a positive way! WebP reduces page load times, which improves Core Web Vitals scores (LCP, CLS, FID). Google considers page speed as a ranking factor, so faster-loading images can help your SEO. Plus, Google specifically recommends using next-gen formats like WebP in PageSpeed Insights.
10. Do I need WebP if I’m already using a CDN?
Yes, WebP and CDNs work together for even better performance. The CDN delivers your files faster, while WebP makes those files smaller. Some CDNs like Cloudflare even have automatic WebP conversion built in, but you still benefit from converting images before uploading them to reduce origin server storage.