Are you new to WordPress and wondering about the concept of WordPress trash? In this comprehensive guide, we’ll delve into what WordPress trash is, where to find it in your WordPress dashboard, and how to effectively manage deleted content within your website.
What is WordPress Trash?
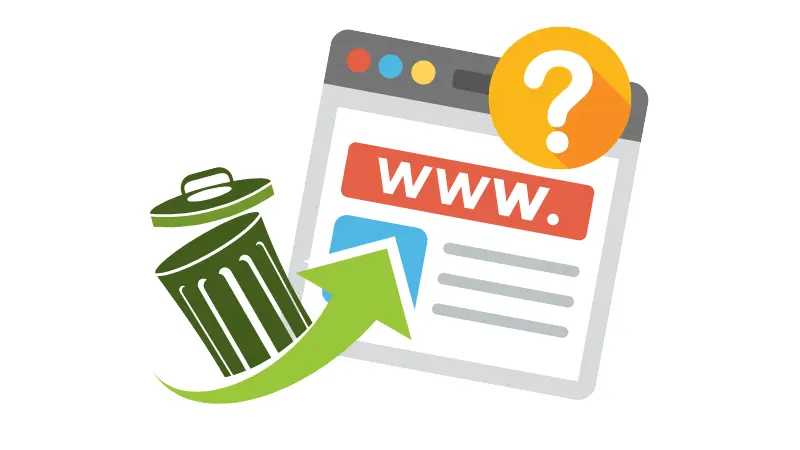
If you’ve ever used a computer, you’re likely familiar with the concept of a recycle bin or trash bin where deleted files are temporarily stored before being permanently removed. In WordPress, the trash serves a similar purpose. It acts as a temporary storage space for deleted pages, posts, and comments within your website.
Introduced in WordPress 2.9 and onwards, the trash feature allows administrators and editors to safely delete content without immediately permanently removing it from the website. However, it’s essential to note that media files, such as images and videos, are not stored in the trash and are permanently deleted upon removal.
Accessing the WordPress Trash
Accessing the trash in WordPress is straightforward. Simply navigate to the respective sections for pages, posts, or comments within your WordPress dashboard. From there, you’ll find a designated tab labeled “Trash.”
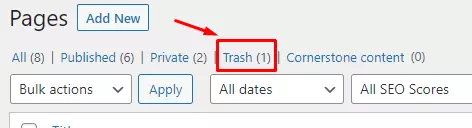
Clicking on the “Trash” tab will reveal all the items that have been recently deleted within that category. Here, you have the option to either restore deleted items or permanently delete them from your website.
How to Empty the WordPress Trash
WordPress also offers functionality to empty the trash, either for individual items or in bulk. Here’s how:
Deleting Individual Items:
-
- Navigate to the trash section for pages, posts, or comments as described above.
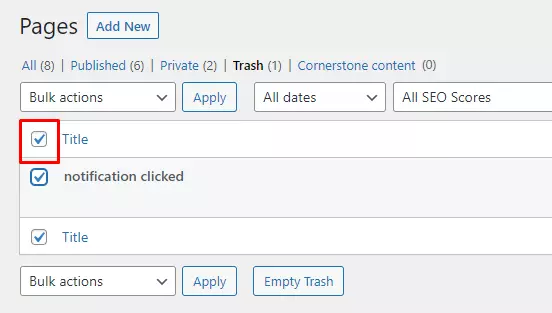
- Select the checkbox next to each item you wish to delete permanently.
- Choose “Delete Permanently” from the bulk action dropdown menu.
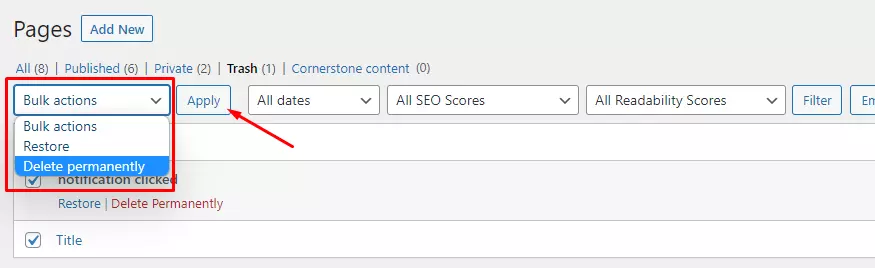
- Click the “Apply” button to execute the deletion.
Emptying the Trash in Bulk:
-
- At the top of the trash page, locate the “Empty Trash” button.
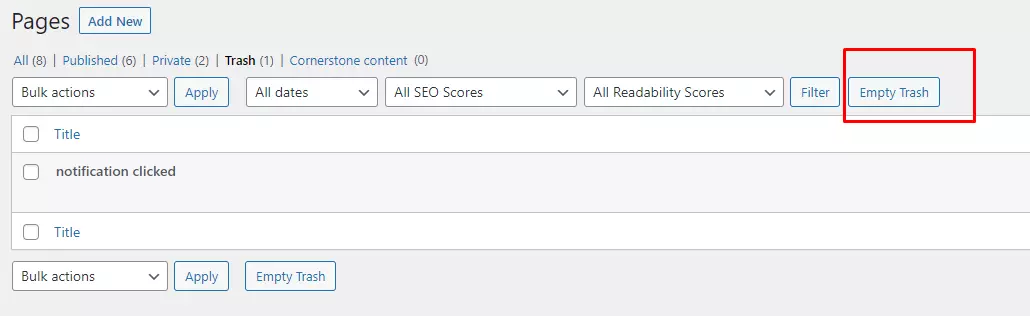
- Click on the “Empty Trash” button to permanently remove all items in the trash at once.
It’s important to exercise caution when emptying the trash, as once content is permanently deleted, it cannot be restored through the WordPress dashboard.
Conclusion
Understanding how WordPress trash functions is integral to effectively managing your website’s content. By utilizing the trash feature, you can confidently delete unwanted pages, posts, and comments while still having the option to restore them if needed.
Remember to keep your WordPress website clean and organized by regularly managing the trash. This practice not only streamlines your workflow but also contributes to the overall maintenance and functionality of your site.
We hope this guide has provided clarity on WordPress trash and its management. If you have any questions or suggestions, feel free to leave a comment below. Your feedback is valuable to us!