
Introduction
If you’re a WordPress user, you might have encountered the annoying ‘413 Request Entity Too Large’ error. This error pops up when you try to upload files that are too big for your WordPress site.
It’s a common problem, especially if you’re uploading lots of images, videos, or large plugins and themes. But don’t worry! In this post, we’ll dive into why this error happens and how you can fix it easily. By the end of this post, you’ll be a pro at managing your WordPress uploads.
What Causes the Error ‘413 Request Entity Too Large’?
Server Configurations and Limitations
The main culprit behind the ‘413 Request Entity Too Large’ error is your server’s settings. Your web server has a limit on how big a file can be when you upload it. If your file is too big, the server rejects it and you see the 413 error. This limit is there to prevent the server from being overloaded by too many large files at once.
File Size and Upload Restrictions
Different servers have different upload limits. Sometimes, these limits are set pretty low by default. For example, if the limit is set to 2MB, and you try to upload a 5MB image, you’ll get the error. It’s all about matching the file size to what your server can handle.
Impact on Your Website
When you hit this error, it means you can’t upload the file you need, which can be super frustrating. It might delay your work or make it impossible to add important content to your site.
For media-heavy sites, like photography blogs or video portfolios, this error can be a big headache.
How to Fix the ‘413 Request Entity Too Large’ Error
1. Using a WordPress Code Snippets Plugin
One easy way to increase your file upload limit is by using a WordPress code snippets plugin. These plugins let you add small pieces of code to your site without having to dive into complicated files, making the process simple and user-friendly.
First, you’ll need to install and activate a “Code Snippets” plugin. This plugin is great because it provides a clean and easy interface for adding custom code to your WordPress site.
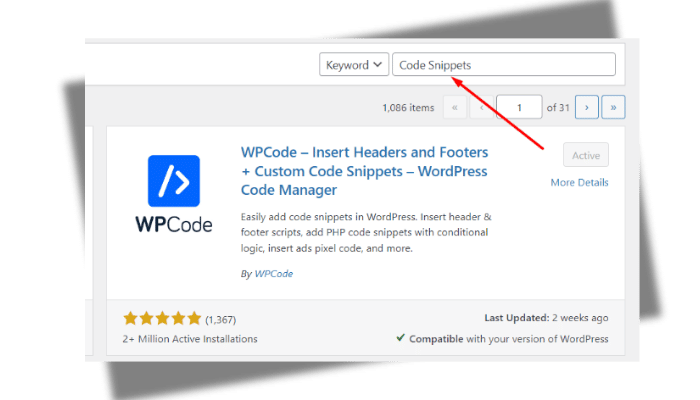
After installing the plugin, go to your WordPress dashboard. Navigate to Snippets and then click on Add New. This is where you’ll add the code snippet that increases your file upload limit.
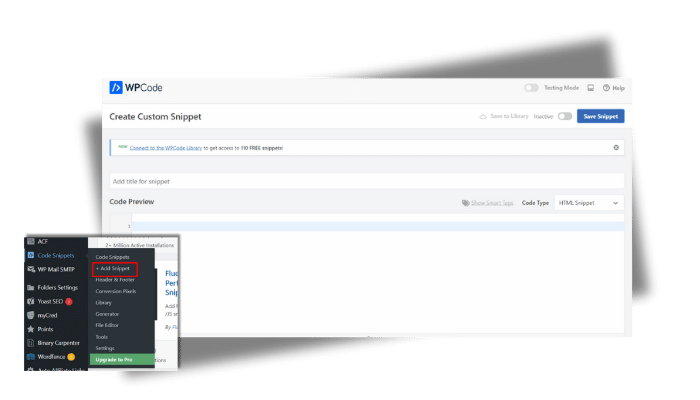
In the new snippet window, paste the following code:
@ini_set( 'upload_max_size' , '64M' );
@ini_set( 'post_max_size', '64M');
@ini_set( 'max_execution_time', '300' );
This code does three things: it sets the maximum upload size to 64MB, the maximum post size to 64MB, and the maximum execution time to 300 seconds. These settings are usually enough to handle most file uploads without running into the ‘413 Request Entity Too Large’ error.
After pasting the code, save the snippet and activate it. Once activated, your upload limits will be increased, allowing you to upload larger files to your WordPress site without any issues. This method is straightforward and doesn’t require any technical expertise, making it perfect for beginners.
2. Editing the .htaccess File
The .htaccess file is another effective way to adjust your upload limits, but you need to handle it with care since it controls many critical aspects of your site.
First, access your site files using an FTP client like FileZilla, or through your hosting control panel, which often includes a file manager.
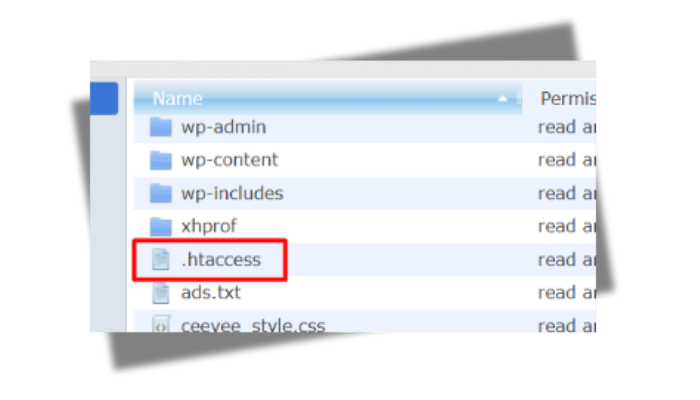
Next, navigate to the root directory of your WordPress installation.You will be able to find it easily. This is usually the main folder that contains other folders like wp-admin, wp-content, and wp-includes.
Locate the .htaccess file in this directory. If you can’t see it, make sure your FTP client or file manager is set to show hidden files, as .htaccess files are often hidden by default.
Once you find the .htaccess file, download a copy to your computer as a backup. This way, if anything goes wrong, you can restore the original file. It is important to be prepared before the accident.
Open the .htaccess file with a text editor like Notepad or a code editor like VS Code. At the end of the file, add the following lines of code:
php_value upload_max_filesize 64M
php_value post_max_size 64M
php_value max_execution_time 300
php_value max_input_time 300
This code increases the maximum file size for uploads to 64MB and adjusts the time settings to allow larger files to upload without timing out.
After adding the code, save the .htaccess file and upload it back to your server, replacing the existing file. Refresh your WordPress site and try uploading your large file again. You should now be able to upload files up to 64MB without encountering the ‘413 Request Entity Too Large’ error.
By carefully editing the .htaccess file, you can overcome upload limits and keep your WordPress site running smoothly.
3. Manually Uploading Files via FTP
First, you’ll need an FTP client like FileZilla as I mentioned above. Sorry, I forgot to tell you about the FTP client. FTP clients are software that let you transfer files between your computer and your website’s server. FileZilla is free and easy to use.
- Download and Install FileZilla: If you don’t already have FileZilla, download it from the official website and install it on your computer.
- Connect to Your Site: Open FileZilla. You’ll need your FTP credentials, which you can get from your web hosting provider. These usually include the FTP host (like ftp.yourwebsite.com), a username, and a password. Enter these details at the top of FileZilla and click “Quickconnect.”
- Navigate to the Right Directory: Once connected, you’ll see two panels in FileZilla. The left panel shows files on your computer, and the right panel shows files on your server. In the right panel, navigate to the
wp-content/uploadsdirectory. This is where WordPress stores all your media files. - Upload Your Files: Find the large files you want to upload from your computer in the left panel. Drag and drop these files into the
wp-content/uploadsdirectory in the right panel. You’ll see a progress bar showing the upload status. Once the upload is complete, the files will be available in your WordPress media library.
4. Using Other Methods and Plugins
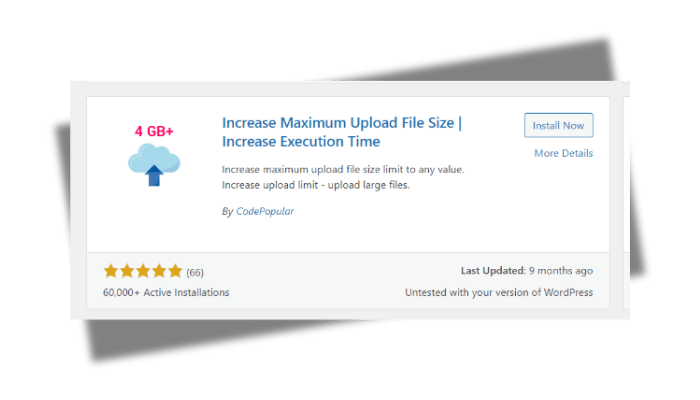
If the above methods don’t work, there are other plugins and methods you can try. Plugins like “WP Maximum Upload File Size” can help you easily increase the upload limit without touching any code.
Importance of Choosing the Right Solution
Different situations might call for different solutions. If you’re not comfortable editing code, stick with plugins. For more control, editing the .htaccess file might be better. Always choose the method that best suits your comfort level and needs.
Tips to Avoid the Error ‘413 Request Entity Too Large’ in the Future
Best Practices for Managing File Uploads
- Optimize File Sizes: Before uploading, use tools to compress images and videos.
- Regular Monitoring: Check your site’s upload settings regularly to avoid running into limits.
- Update Plugins and Themes: Ensure all your site components are up-to-date to avoid compatibility issues.
Considerations for Optimizing File Sizes
- Image Compression: Use tools like TinyPNG or JPEG-Optimizer to reduce image file sizes.
- Video Compression: Use software like HandBrake to compress video files without losing quality.
- Split Large Files: If a file is too big, consider splitting it into smaller parts.
Conclusion
The ‘413 Request Entity Too Large’ error can be a major roadblock, but with the right approach, you can easily fix it. Remember, whether you use a plugin, edit the .htaccess file, or manually upload via FTP, there’s a solution for everyone. Keeping your upload limits in check and optimizing your files will help you avoid this error in the future.
For any WordPress error, like the ‘413 Request Entity Too Large’, WP Error Expert AI tool can be a lifesaver. It can help you get solution very quickly. Plus, if you’re a web developer, our AI tool for web developers can make your life a lot easier by handling common errors and providing solutions fast. Happy uploading!