Have you ever thought about how important it is to hide your WordPress site while building?
In the digital realm, first impressions are everything. When constructing a WordPress site, it’s paramount to keep it under wraps until it’s ready to dazzle visitors.
The question then arises: how to hide your WordPress site while building? A few years ago, building a WordPress site with hiding it was challenging. Now, with the right method, it’s a breeze.
This step-by-step guide offers the best practices to ensure your site remains unseen until its grand unveiling.
Understanding the Importance of Hiding Your WordPress Site
When embarking on the journey of building a WordPress site, keeping the developmental stages out of the public eye is a strategic move for several compelling reasons.
Foremost among these is the protection of your brand’s image. Presenting a site that’s not fully operational or aesthetically complete can deter potential followers or customers.
It is like opening the door of a warehouse that is still under construction; A cluttered website will drive visitors away from you. Moreover, a site in development is often subject to frequent changes, tests, and possibly errors, which are best resolved away from the scrutinizing eyes of your audience.
Additionally, safeguarding your site from premature exposure to search engines is crucial for your SEO strategy. An under-construction site crawling with incomplete content or placeholder text can harm its future rankings.
Thus, hiding your WordPress site while it’s being built is not just about aesthetics; it’s a calculated step towards securing a strong first impression, maintaining the element of surprise, and laying a solid SEO foundation for when your site officially goes live.
Choosing the Right Method for Your Needs
Selecting the optimal way to hide your WordPress site during its development phase hinges on understanding your unique project requirements.
The decision-making process should factor in whether you’re starting from scratch or refurbishing an existing site, your comfort level with technical tasks, and the necessity to grant access to select individuals during construction.
For newcomers or those seeking simplicity, leveraging a Coming Soon or Maintenance Mode plugin offers an immediate and easy-to-implement solution, providing a professional appearance while work is underway.
For those prioritizing security or needing to share progress with specific stakeholders, password protection of the entire site or individual pages might be the way to go.
Meanwhile, developing your site on a local server appeals to those desiring complete privacy and control, making your work invisible to the outside world until you decide it’s showtime.
Lastly, if avoiding the eyes of search engines is your main concern, utilizing WordPress’s built-in option to discourage indexing is a straightforward approach.
Each method caters to different needs and preferences, guiding you toward the most fitting choice for your project’s confidentiality and development workflow.
Implementing a Coming Soon or Maintenance Mode Plugin
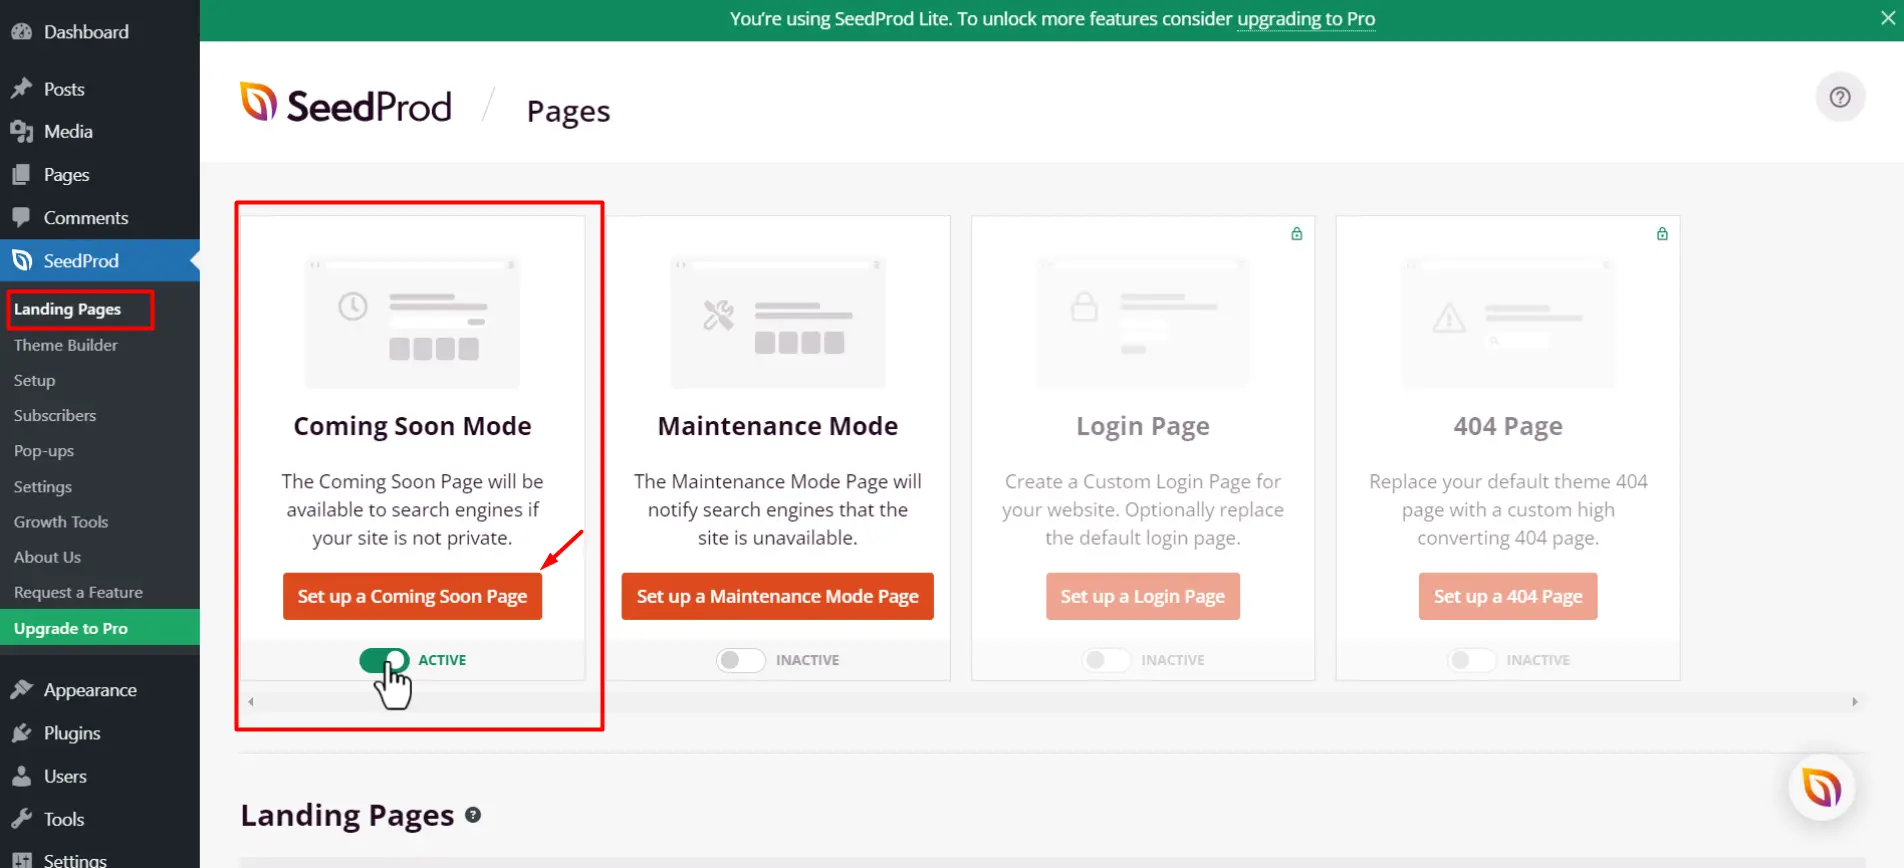
To effectively cloak your WordPress site during its development, employing a Coming Soon or Maintenance Mode plugin stands out as a straightforward and efficient choice. These tools enable the deployment of a static page that clearly communicates to visitors that your site is a work in progress, all while allowing you the freedom to build and refine in the background.
Initiating this process involves selecting a plugin that aligns with your brand’s image and message. Popular options like WP Maintenance Mode or Coming Soon Page & Maintenance Mode by SeedProd are notable for their ease of use, requiring minimal technical expertise to customize.
Step 1: Install the Plugin
After choosing your plugin, installation is your next step. This can be done directly through the WordPress dashboard under the Plugins section by searching for your selected plugin, click ‘Install’, and then ‘Activate’.
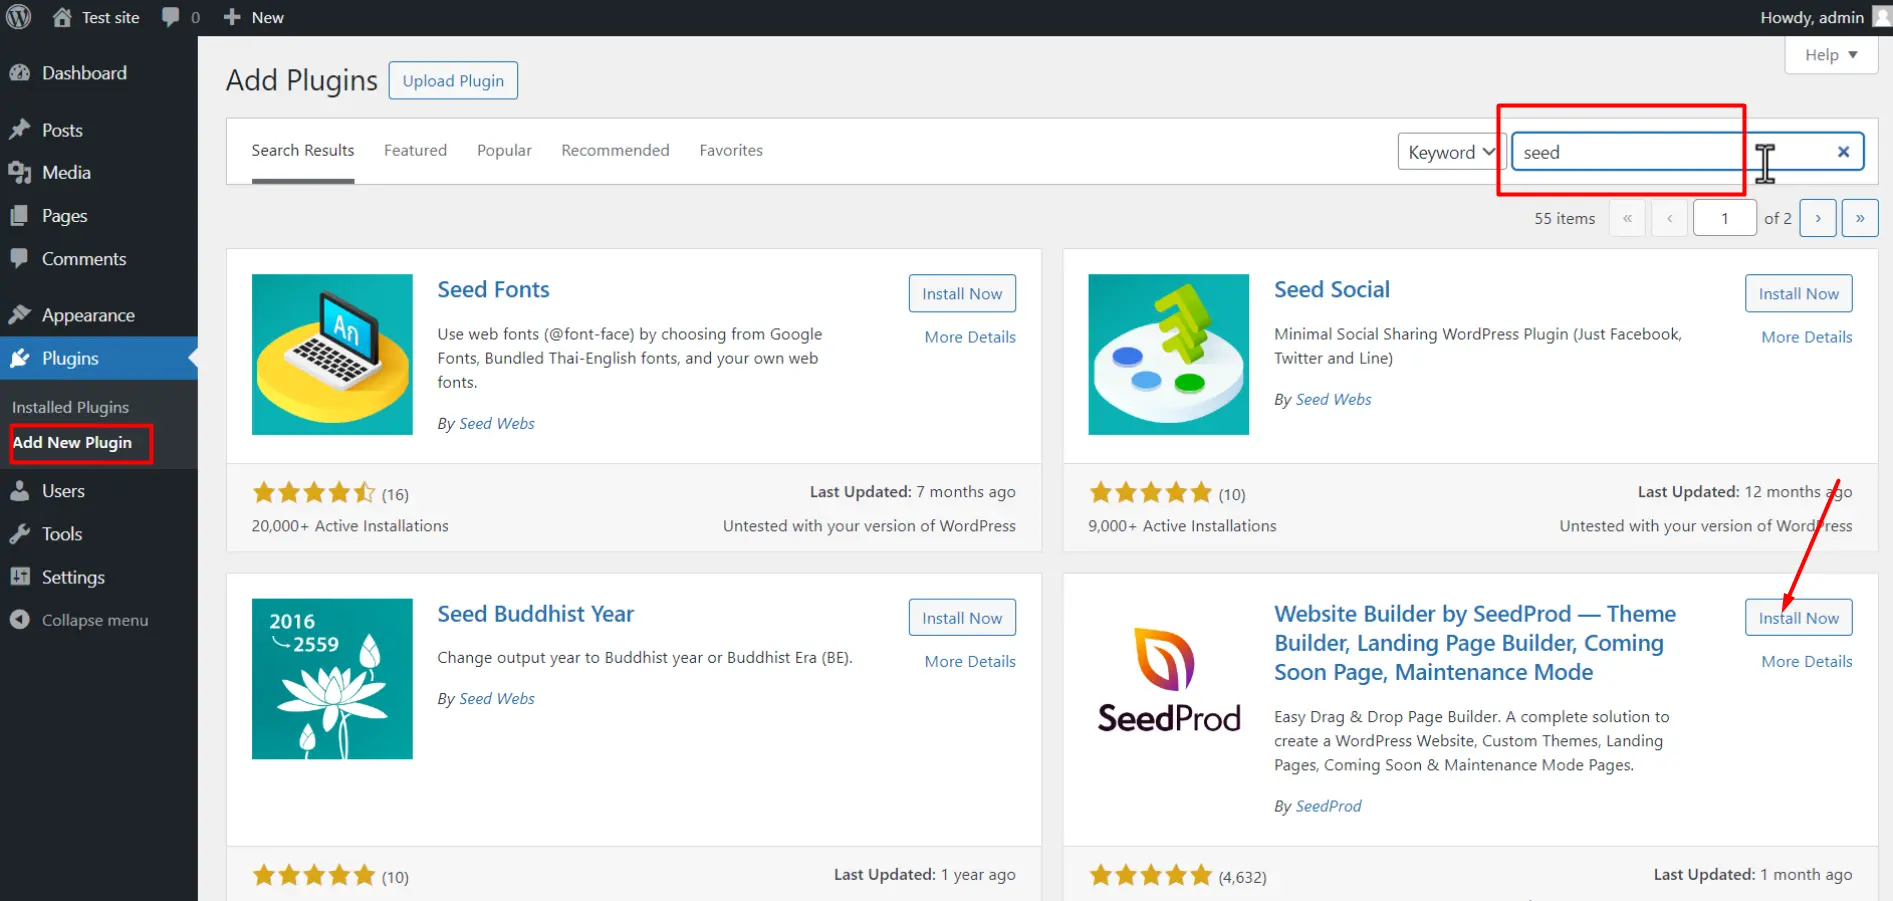
An important thing to note here is that this plugin has now developed into a page builder plugin. But this plugin makes an important contribution to implementing Coming Soon or Maintenance Mode pages.
Step 2: Customize the Maintenance/Coming Soon Page
Following activation, you can delve into customization options, tailoring the appearance of your maintenance or coming soon page to mirror the essence of your brand.
Here you can get a prebuilt template for free from SeedProd and by subscribing to them, you get access to up to 10 templates and the pro version to access other templates.

Step 3: Personalize the Page
This customization can include adding your logo, crafting a compelling message to inform visitors of your site’s forthcoming launch, and even integrating a sign-up form to capture interested leads.
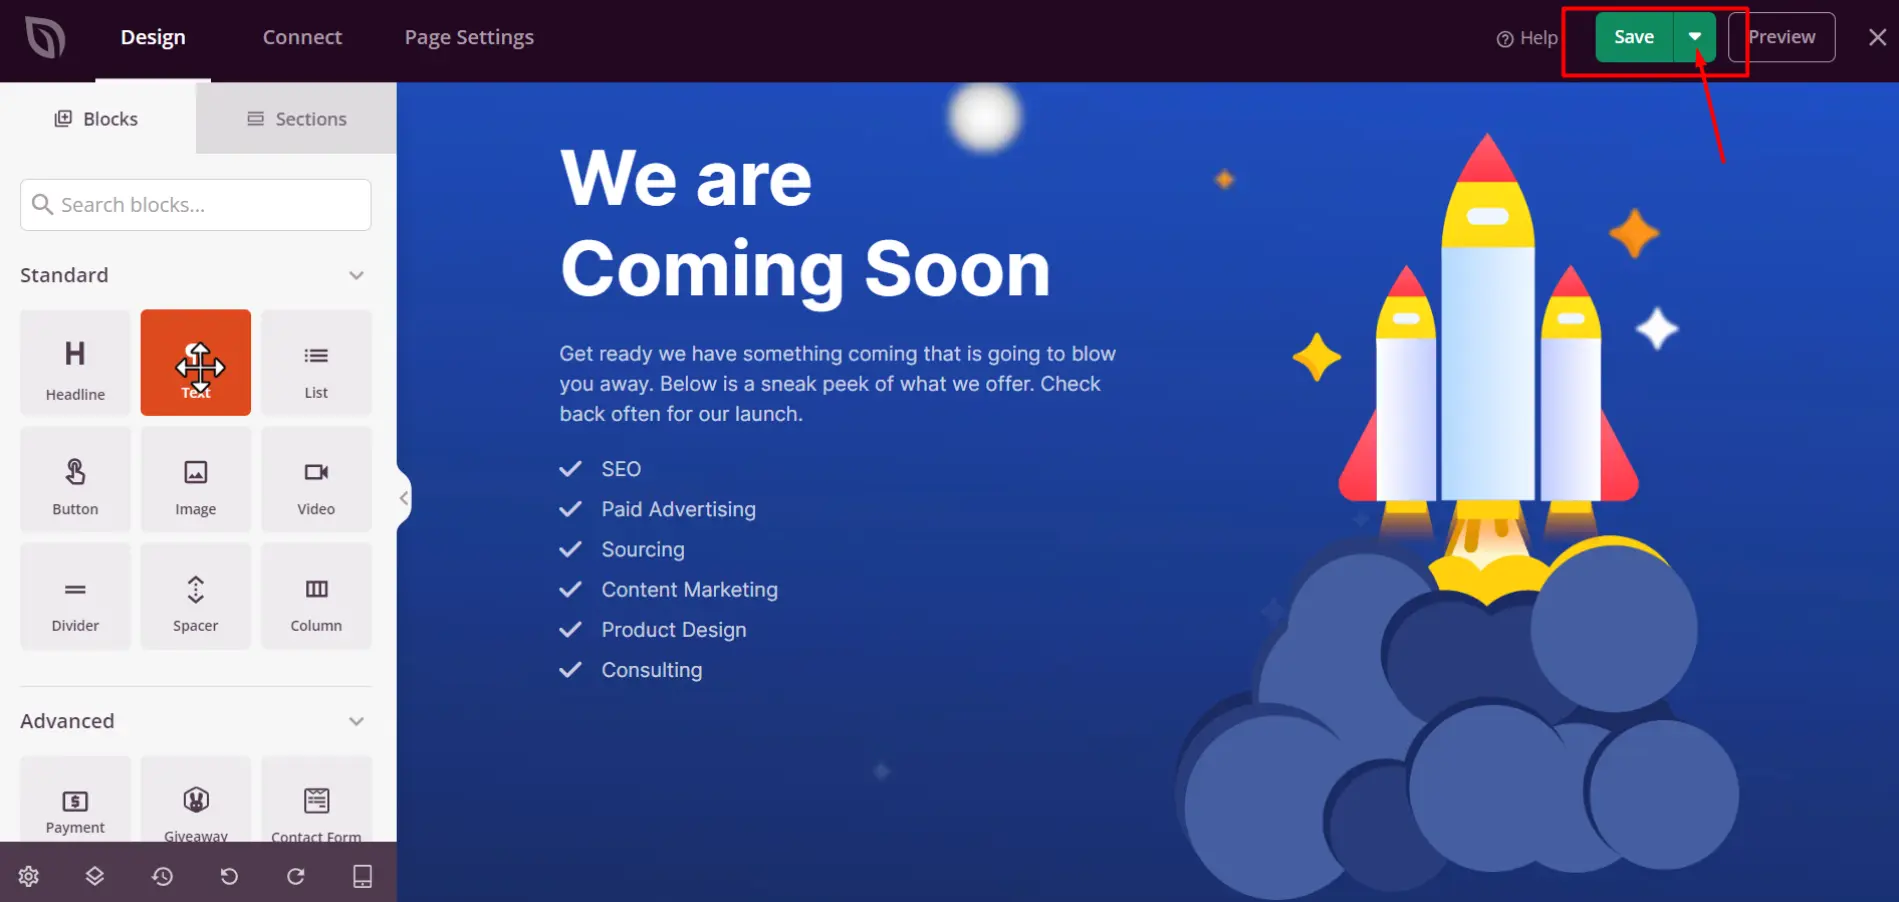
After making the necessary changes, click the down arrow next to the 'Save‘ button and ‘Publish’ your Coming Soon Page.
After that, you can view your Coming Soon Page by using the 'See Live Page‘ option.

Through these plugins, your site remains hidden from the public eye, but it does not affect your development and testing.
Password-Protecting Your Site
Password protection serves as a robust method for safeguarding your WordPress site while it’s under development, allowing only those with the necessary credentials to access it. This approach is particularly beneficial when you need to share progress with stakeholders, such as clients or team members, without making the site publicly available.
Plugins like Password Protected offer an easy-to-use solution, enabling you to quickly secure your entire website with a single password.
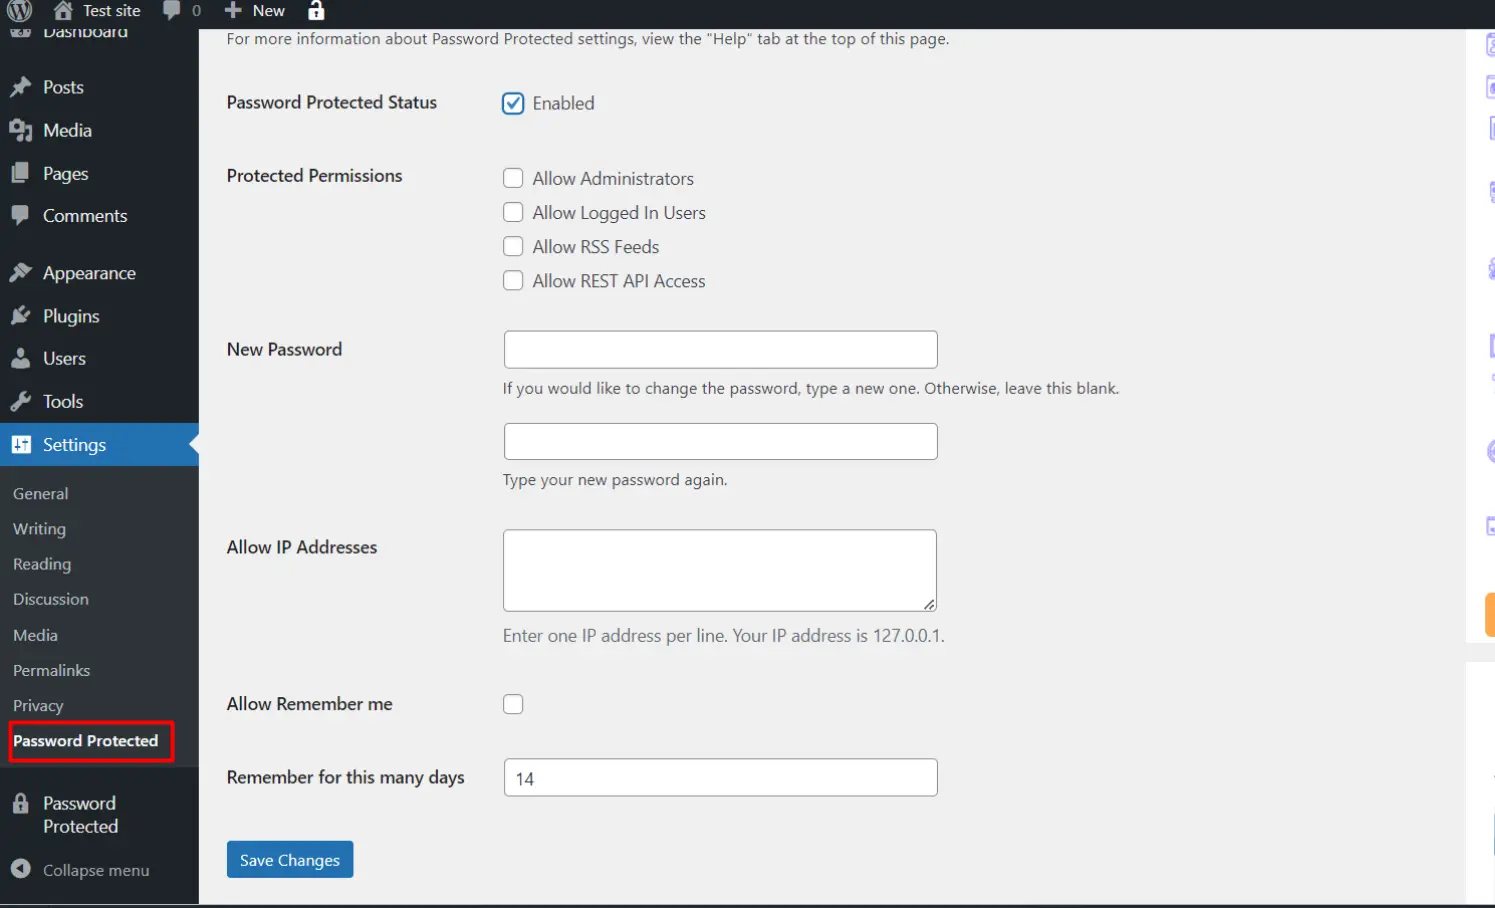
If it is mentioned here how to use the Password Protected plugin, first of all, you need to install and activate the plugin. Next, you can access the plugin by going to the settings and clicking on Password Protected.
You can prevent visitors from entering your website by enabling Password Protected Status here and getting a password. If you want, administrators or users can access the website without using a password under Protected Permissions.
Also, Allow IP Addresses allows you to specify which IP addresses can view your site.
By Allow Remember Me and Remember for this many days, you can continue working on the website without entering a password within the time you specify.
Alternatively, for those with technical expertise or specific requirements, editing the .htaccess file presents a more advanced option. This involves adding code snippets to your .htaccess file, effectively creating a password-protected barrier for your site or selected directories within it.
Regardless of the method chosen, the goal is to create a secure environment that ensures only authorized individuals can view the site during its construction phase. Implementing password protection not only enhances security but also provides a level of exclusivity, making the eventual unveiling of your site all the more anticipated by those who’ve been granted early access.
Developing Your Site Locally
Building your WordPress site on a local machine is a discreet yet powerful approach to web development. This method entirely isolates your project from the online world, providing you with the privacy to experiment and build at your own pace.
To get started, select a local development tool such as Local by Flywheel or XAMPP, which simulates a server environment on your computer.
The installation of these applications is generally straightforward, guiding you through setting up a local version of WordPress. The beauty of this approach lies in its speed and accessibility; you can make immediate changes and see the results without the delays associated with internet connectivity or server response times.
Additionally, working locally means you have the freedom to break things without the risk of public exposure, allowing for a more creative and thorough development process.
When your site is polished and ready, the next step involves migrating your work to a live web server. This transition requires careful attention to ensure all data is correctly transferred and functioning as intended on the new host.
By developing locally, you harness complete control over your WordPress project from inception to launch, crafting your site in a secure and efficient environment.
For a more detailed guide, here’s our blog on How to Build a WordPress Site Offline and Upload Like a Pro
Utilizing the Discourage Search Engines Option
For those whose main concern lies with keeping their site under the radar of search engines during the development stage, WordPress provides an uncomplicated yet effective solution.
Navigate to Settings > Reading within your WordPress dashboard, where you will find the option “Discourage search engines from indexing this site.”
By checking this box, you’re instructing search engines to bypass your site, which helps prevent it from being indexed prematurely. It’s important to note, though, that this method doesn’t offer an absolute guarantee against indexing, as search engine crawlers may not always adhere to this request.
However, it serves as a beneficial measure for minimizing visibility online while you’re still fine-tuning your site. Keep in mind that once your site is ready for the spotlight, you should promptly revert this setting to welcome search engine indexing, ensuring your site’s content can begin to rank and attract traffic.
This step is crucial in transitioning from a development phase to live, making sure your site is positioned for maximum online visibility right from its launch.
Managing User Access and Permissions
Effective management of user access and permissions is a cornerstone of discreetly developing your WordPress site. WordPress comes equipped with a set of built-in user roles, including Administrator, Editor, Author, Contributor, and Subscriber, each designed with varying levels of access and capabilities.
This feature allows you to allocate the appropriate level of site access to different individuals, from team members who need full administrative rights to clients who may only require viewing capabilities.
For a more tailored approach, consider utilizing plugins like User Role Editor. This plugin enhances your ability to fine-tune permissions beyond the default roles, enabling you to create custom roles that fit the specific needs of your project.
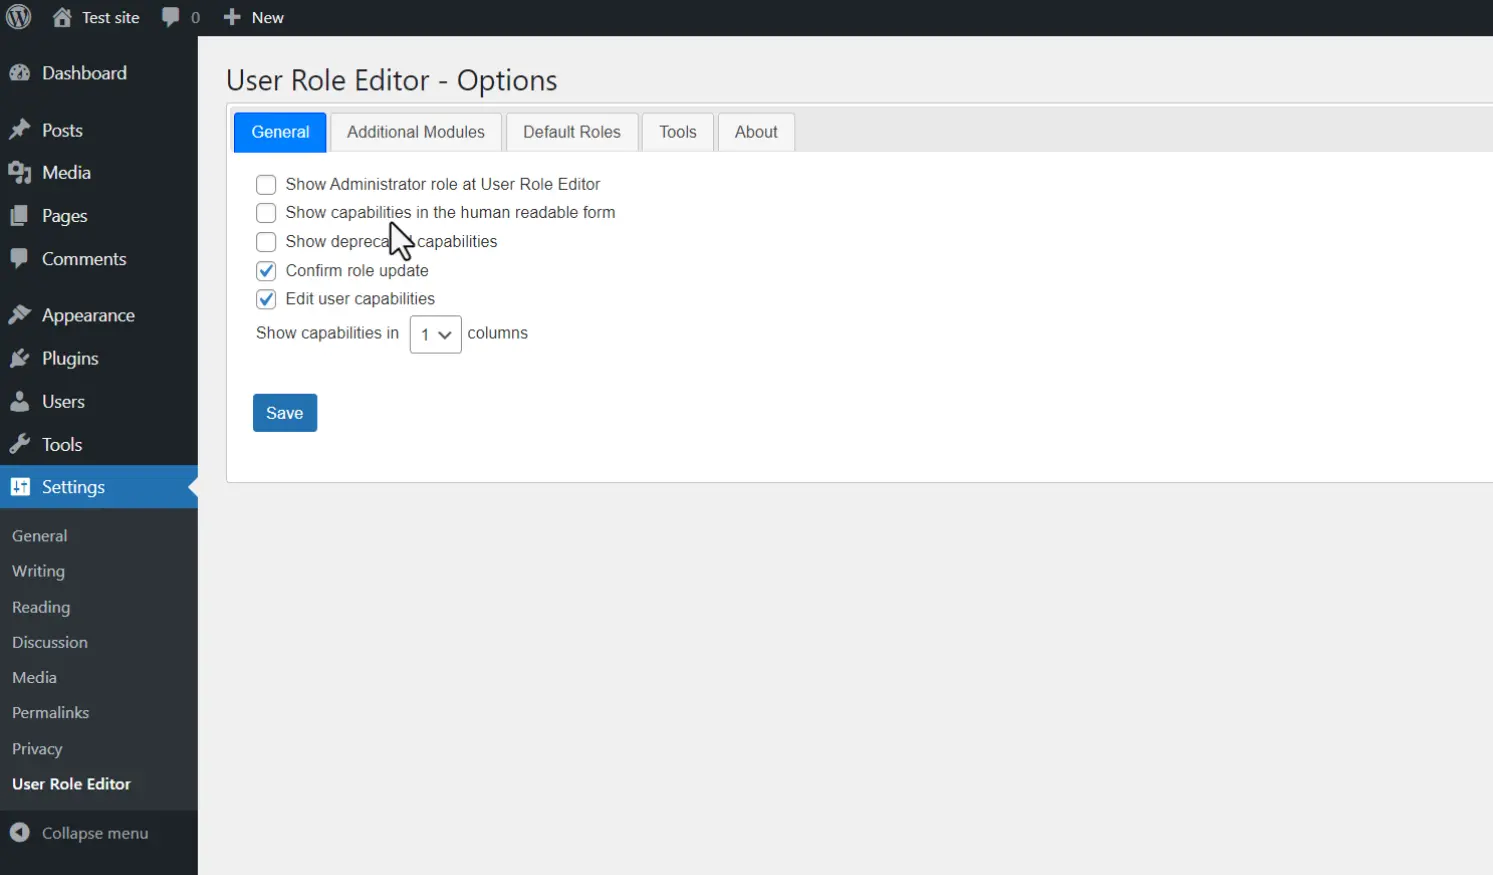
By carefully managing who has access to your site and what actions they can perform, you maintain a secure environment that fosters productivity and keeps unauthorized viewers at bay.
This strategic control is instrumental in facilitating a smooth development process, ensuring that only those with a legitimate need to access the site during its construction phase can do so.
Testing and Feedback Collection in Stealth Mode
Securing valuable feedback during the development phase is crucial, yet maintaining the confidentiality of your WordPress site need not be compromised.
By strategically utilizing password protection or a coming soon plugin, you can selectively grant access to a curated group of users. This could include stakeholders, beta testers, or a focus group, depending on your project’s scope and requirements.
Utilizing digital tools such as Google Forms or Typeform, you can streamline the feedback collection process. These platforms allow you to create detailed questionnaires or surveys tailored to the aspects of your site you’re most keen on refining.
Share these forms with your selected testers to gather insights, which can then be analyzed and implemented to enhance the overall quality and user experience of your site.
This method ensures that your site remains under wraps from the general public while still benefiting from critical evaluations and suggestions.
Engaging with your chosen audience in this way fosters a collaborative development process, enabling you to make informed adjustments that align with your vision and user expectations.
Preparing for the Big Reveal
The countdown to your website’s launch is an exhilarating time filled with anticipation. At this juncture, meticulous attention to detail is crucial to ensure a seamless transition from hidden gem to public spectacle.
Begin by deactivating any plugins or features that were instrumental in keeping your site under wraps, such as Coming Soon or Maintenance Mode plugins.
It’s imperative to perform a comprehensive review, focusing on the site’s aesthetics, navigation, and overall user experience. This stage is also the perfect opportunity to verify all content for accuracy, ensuring that no placeholder text or images remain.
Equally important is a thorough examination of the site’s functionality across various devices and browsers, guaranteeing a smooth and accessible experience for all visitors.
Preparing your marketing materials in advance, from press releases to social media posts, will enable you to hit the ground running the moment your site goes live.
This strategic approach not only maximizes your launch impact but also sets the stage for your website’s long-term success.
Going Live: The Final Steps
As you stand on the brink of showcasing your WordPress site to the world, it’s crucial to ensure everything is in impeccable order.
Begin by reviewing all site elements for coherence and accuracy, removing any placeholders, and verifying all links are functional. It’s essential at this stage to lift any barriers that keep your site hidden, including disabling Coming Soon or Maintenance Mode plugins and ensuring your settings welcome search engine indexing.
Confirm the responsiveness of your website across various devices and browsers to guarantee an optimal user experience for every visitor.
Lastly, execute a final backup as a precautionary measure before making your site public. With these preparations complete, you’re ready to launch.
Amplify your site’s debut through well-coordinated announcements across your marketing channels, capturing the attention and interest of your audience from the get-go.
Your diligent efforts behind the scenes are about to pay off as you introduce your WordPress site to the digital world.
Conclusion
In conclusion, hide WordPress site while building is a strategic method with multiple benefits, and will allow you to present a polished and impressive site in time.
By understanding the importance of confidentiality in this process, you’ll protect your brand image, strengthen your SEO strategy, and stop your site from being leaked to users before it’s launched.
Selecting the appropriate method to hide your site, whether through a Coming Soon or Maintenance Mode plugin, password protection, local development, or search engine discouragement depends on your project’s unique needs and your comfort level with technical tasks.
Implementing these strategies empowers you to build and refine your site in a secure environment while giving selective access to essential stakeholders for testing.
Here managing user access and permissions further enhances security and productivity, ensuring that only authorized people can contribute to the development process.
By following these steps, hide your WordPress site, build it in secret, and reveal it to the world when it’s ready to really shine.
Please do not hesitate to comment below if you have any questions regarding how to hide the WordPress site while building. We’ll respond as soon as possible.